A Facebook buddy recently purchased a grill for BBQ and asked for advice and suggestions on BBQing. This prompted me to write this blog as a BBQ primer via Pulled Pork, so Brandy this post is for you.
Brine Software:
•8 ounces or 3/4 cup molasses
•12 ounces pickling salt
•2 quarts bottled water
•6 to 8 pound Boston butt
Rub Software:
•1 teaspoon whole cumin seed
•1 teaspoon whole fennel seed
•1 teaspoon whole coriander
•1 tablespoon chili powder
•1 tablespoon onion powder
•1 tablespoon paprika
6-8 Pound Pork Shoulder
Hickory wood chunks
Buns
Cole Slaw
Hardware:
Smoker or BBQ grill of your choice.
Start with getting a 7-8 pound pork shoulder or Boston butt. Although its called the Butt its actually the back side of the leg muscle. It has tons of connective tissue unlike other leaner meatier pork pieces such as the loin.
Fatty/Gristly Vs. Lean/Meaty
When BBQ at low and slow temperatures you're better off with less expensive fatty and connective pieces of meat such as brisket or Boston butt. The fat content allows it to cook for an extended period of time without drying out. Low and slow cooking also allows much of the connective tissue and fat to render out leaving only water and sugar. This leaves your protein filled with pockets of moist flavor. These type of meat are very typical for BBQ. Leaner and meatier cuts of meat such as Pork Loin or
Filet Mignon packs great flavor but due better fast and hot such as grilling. This allows you to sear the meat with a crust to entrap the moisture and cook it through. The leaner meats you can cook to a medium allowing some of the moist texture of the meat to remain. So think BBQ = Fatty cheap cuts and Grilling = leaner more prime cuts.
Start by mixing the Brine mixture together and and place the whole shoulder or butt in making sure its completely submerged. I like to leave it in a dutch oven with the lid on. Keep this in the
brining liquid for a minimum of 4 hours up to 18 hours refrigerated.
Brining:
Think of
brining as a marinating process. What happens is you place a significant amount of salt in a flavored liquid. Since nature will always want to equalize the liquid will start to infuse into the meat. What this does is bring in additional water content, bring in the marinade directly into the meat, and break down the protein to tenderize the meat. This works great for almost all meats that you intend on cooking for a long period of time such as BBQ or roasting.
Rub:
After about 12 hours, dry the shoulder out and pat dry. Mix all of the dry rub ingredients in your spice grinder, mortar and pestle, or food processor and rub it into the meat. Leave the meat in a dutch oven try and covered in the rub for another 12 hours refrigerated. Drying out the surface allows for the meat to form a nice crust when BBQing. This will allow for the moisture to be trapped internally in the meat.
On the day of the BBQ set your Grill up for Indirect heating with your choice of hardwoods nestled into the charcoal. Preheat for at leas an hour and use the time to clean and oil your cooking grate. Replenish after about 4 hours when your temperature drops and / or your smoke lowers.
Minion Method:
To allow the heat to continually heat for an extended period of time without replenishment I like to fill the charcoal bucket with unlit coals and hardwood (I use hickory and mesquite). Place the fully lit coals on top. As it burns down it will light the unlit charcoal and Wood allowing it to continue cooking even when your original lit coals burn out.
Direct Vs. Indirect heating:
When grilling lean and meaty meats direct heat works great. What this means is that the heat source is directly near or in contact of the meat cooking it very hot and fast.
Indirect heat is when the heat source is offset allowing the grill surface to be cooler. This is a finishing area by which you will allow your meats to cook through. What you will end up doing is searing on the direct heat side and moving it over to the indirect side to cook through. When BBQing you will almost always spend the majority of your cooking time on the indirect side to cook slow at lower temperatures.
Fuel Source Lump Charcoal Vs. Briquets Vs. Gas Vs. Electric:
Most BBQ enthusiasts will almost soley stick to charcoal briquets or lump charcoal. Lump charcoal is make from fire kiln dried hardwoods leaving nothing but pure carbon behind. They typically burn hotter and quicker but cleaner and imparting a nice char smokey taste to your food. Charcoal Briquets originated from the Ford Motor company originally where scrap wood was chopped up and compressed with saw dust, chips and petroleum. This allows for a nice even heat that cooks for longer without replenishment. This hows has some petroleum in it and burning it off fully before use is best. Some people with a discerning palette can actually taste a bit of the petroleum. This imparts less of the smoky flavor in your food but better char flavor than gas or electric. Gas and electric will allow you more control over your heat source but it will impart little to no flavor onto your meat. It is a wetter heat source so it will impart more of a moist cook to your food.
You would want your heat to be constantly around 225 degrees for your pulled pork although it will have a momentary tolerance from 190 - 250 Degrees but don't take the tolerance for granted.
Heat up your Grill and take your pork shoulder about for about an hour to heat up to room temperature. This allows for more even cooking without pockets of cold producing uneven heating. Pat down the should and place on the grill with an internal thermometer placed into the thickest part of the pork without hitting the bone.
I like putting a flavored water pan underneath allowing for a moist marinating wet heat. This also provide another layer between the heat source and the shoulder for indirect heating.
For my Water Pan:
I like putting in water, whisky or a dark rum, ouzo, sage, oregano, thyme, and Rosemary. This also acts as a drip pan allowing for the rendering fat to remain collected instead of burning onto the coals causing flares up and potentially carcinogenic elements to be released into the air.
Cook for 1.5 hours per pound or until the internal temperature reached 190-210 Degrees. This will typically be around 12 hours. You will notice that your internal temperature will race to about 140-169 degrees then plateau for a long period. At 160 your shoulder is technically cooked but tough and gristly. At the plateau is where the collagens and connective tissues are actually breaking down into water and sugars and becoming tender and soft.
Once fully cooked remove from your grill and wrap fully in a heavy gauge aluminum foil for 1.5 hours.
Once fully cooled using your hand remove the skin and bone from the flesh. This should easy as the meat will literally fall off the bone if done right.
You should notice that the flesh is pinkish in color. This doesn't mean its raw but rather that the smoke has actually permeated the flesh into the meat. The thicker the smoke ring from the skin the greater the smoker you have actually yielded from smoking.
Bark:
The crusty seasoned exterior of the pork is most commonly known as the bark. This chewier, drier, denser, flavored bit should be shredded and mixed homogeneously into your pork shreds. This will give you some texture and full flavored bursts in your sandwich. Some people don't like it. I love it! It also does well chopped up and mixed into baked beans for added smokey flavor.
Discard the skin and bone or give it to your dog as I have with Mollie.
Now shred the flesh with either your fingers or a fork. Drizzle with apple cider vinegar or homemade BBQ sauce and serve on a toasted bun with Cole slaw.


 book. The starter was for Vanilla ice cream.


 My wife and I had a debate on whether or not to heat the mixture up (like a custard), but she indicated that a chef friend of ours in London insisted that it needed to be heated up (original recipe didn't call for it.)


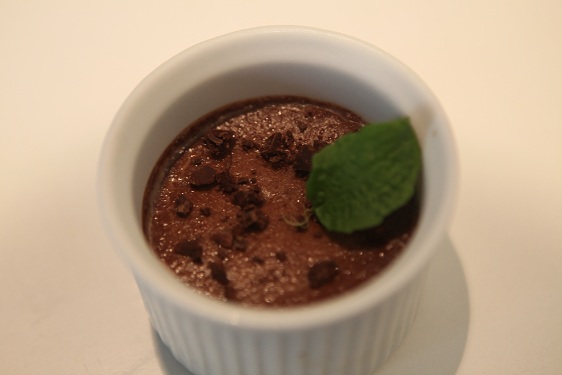

 in a baking dish in the oven. Make sure your baking dish has high sides as you'll be filling it up with the boiling water. Heat the oven to 325.


